Tag: dash

Fiero stereo installation is complete
With the mounting plate finished and painted, the stereo system was completely installed. The system sounds great great (4x50w) and the iPod integration works terrific. Surprisingly this was an easy installation, and only took 3-4 hours (total time).

Fiero sub woofers
I finished the installation of the Fiero sub woofers, and powered up the SST radio for a test run. I still have a wiring mess to hide, …but it sounded great!

Custom mouting plate for the SST
The new SST radio comes with a flush mounting kit. This allows the controller to be mounted “properly” in the dash – rather than using the standard bracket. In order to mount it in the Fiero, …like everything else, …fabrication needs to be done. I…

Fiero interior is pretty much DONE
I need to install the interior door panels, …and finish installing the sound system, …but aside from those two elements, the interior is done.

Fiero custom dash is now installed!
Big day. After 7 months of hard work, the dash is finally back in. I still need to add the components – such as the extra gauges and the MP3 player. But it is satisfying to see this interior come together. FINALLY.

Fiero dash vent
I re-used the original grille for the front window vent on the PISA dash. I cut off all the mounting tabs, sandblasted the old paint off, then I put on a fresh coat of black paint to match the rest of the interior. An epoxy…

Fiero speaker covers
The original speaker grilles (both front and rear) were re-covered with speaker cloth. I used 3M spray adhesive to attach the cloth.

Fiero custom centre console
The upholstery on the centre console/armrest is now complete. The openings for the shifter and the window switches were created.

Fiero upholstery touch-ups
When I received the interior pieces back, some of the holes I cut out were covered by the leatherette installation. I used a marker to outline the cuts, a box-cutter knife to slice the leatherette, and super glue to adhere. Super glue works best because…

Painting the interior pieces
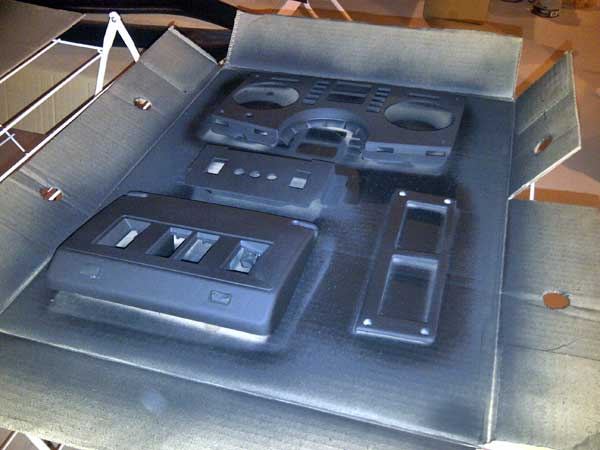
Painting, painting, and more painting. It is really amazing how many pieces you have to paint when you are changing the colour of the interior.

Fiero interior is ready for re-installation
All the components from the interior have been removed. I also began transferring over the sound proof padding material from the original pieces.

Fiero interior pieces are back from upholstery
The interior pieces came back from upholstery, and all I can say is WOW. I can’t wait to get these installed! The pictures don’t do them justice.

Prepping the Fiero dash for upholstery
I’m just finishing off a few outstanding items: – Completion of the glove box with magnets. – Addition of a multi-switch plate inside the glove box – I will wire additional lighting (for car shows) to these switches in the future. – Completed the speaker…

Revisit the Fiero glove box
The Velcro option was not working well. So I came up with another solution – MAGNETS. I used epoxy to glue a 9″ piece of metal to the glove box door, and I secured 4 magnets to the internal adjuster plate.

Fiero HVAC system is complete
I have completed the installation of the HVAC system. The 2.5″ SHOP-VAC tubing was used to run the air-flow, and a plate (made of fiberglass) was fabricated – this allowed the tubes to mount to the stock HVAC outlet. This was a time consuming modification…

Fiero ducts are mounted
The ducts were secured to the fiberglass dash using something called a Chicago nut/bolt fastener – they are also called barrel nuts/bolts. They have a very low profile, so it won’t interfere with the upholstery or the trim pieces. The couplers I glassed in are…

Fiero HVAC ducts
Not the prettiest application of fiberglass, but it works! A fresh coat of paint always makes it look better.

Fiero glove box
It took me a while to think of how I was going to keep the glove box door secured during driving. The solution was simple – VELCRO.

Fiero PISA dash glove box install
It took a while for me to think about how I was going to mount the glove box door. I found a set of 1″ brass hinges (at Canadian Tire) that were small enough to be hidden, …but big enough to provide support strength. The…

Solution for custom Fiero HVAC
I’ve decided against the installation the stock HVAC system – it was causing fitment issues with the PISA dash. So I’m going to run a custom venting system using vacuum tubing. More details to follow….

Fabrication of custom bracket for Fiero junction box
Since I am installing the PISA Fiero dash, I have some room to add an electrical junction box. This junction box will act as a future expansion for interior electronics. I used an existing bracket I pulled from the Fiero and welded it onto another…

Fiero interior has been dismantled
I dismantled the custom interior pieces from the chassis. It involved almost 2 months of custom fabrication to install the new interior, and it took a mere 20 minutes to uninstall everything. A few more pieces need to be installed on the dash, …but the…


