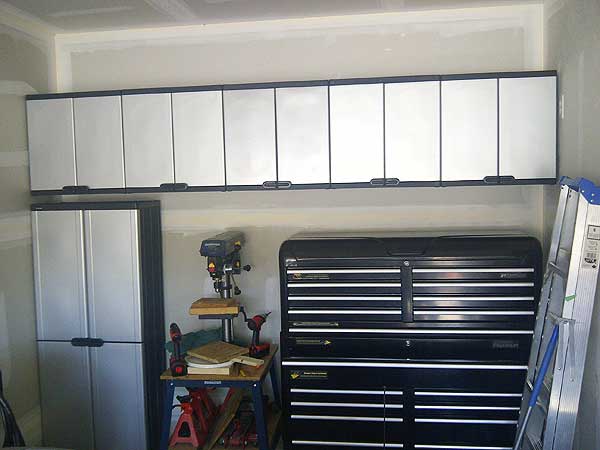
Man cave build-up
Man cave build-up. AKA, the garage. I will let the pictures do the talking…

Fiero engine bay
I was doing some measurements for a turbo installation. It’s been a while since I touched the engine bay, so I thought i’d post a picture of it’s current state.

LCD TV corner mount bracket
I purchased this from a store in the Mississauga area. It is a bracket specifically designed for corner mounting a TV – it has two separate mount points. Quite well made – the metal is 1/8″ thick. In ordered to properly mount it, I used…

Building a Shed Base – The Right Way
The grading on our property had a ditch at the north side. Unfortunately it was in the area where a planned shed was going to go. We could not alter our grading because of the municipal engineering for water drainage. So a base was required…

RBK X-Pulse goalie blocker
I purchased this blocker a few weeks ago – it was only used for 30mins by it’s previous owner. It’s a very well made blocker – the quality of material is leather with some weave material. The palm seems very “heavy-duty”, yet it’s very comfortable…

Koho 570 goalie glove
I purchased this Koho 570L goalie glove off ebay – as you can see, it was hardly used. If you have big hands, this glove will fit you perfectly – lots of room. Unfortunately you won’t be able to use this catcher if you play…

Installing an electrical panel plywood “backer”
The builder didn’t provide anything to mount accessories around the electrical panel. Most builders (obviously not all) give a plywood surface to mount the phone demarcation point and satellite/cable lines. Since organization makes life easier, …a plywood panel needed to be installed. This was a…

Installing a LCD screen mount with no stud anchors
If you need to install an LCD screen in an area that doesn’t have studs accessible to anchor the mount(s), then this post should help you out. There are two windows (on each side) where the LCD mount needed to be installed. The mount being…

How to install a fridge water line
Our fridge has an automatic ice maker and a filtered water dispenser. Having done this before, I wanted to make this install as CLEAN as possible. So the steps involved are: Buy an ice-maker/water-line kit from your local hardware store and pick a spot behind…

Fiero OEM outer dew wipes
The outer dew wipes commonly become brittle and fall apart over the years – mine were cracking badly. I bought a set of NOS OEM dew wipes from a local Fiero owner. It took about 2.5 hours to install.

Fiero LED marker lights
With the Ferrari 355 nose, I lost the side marker lights. So in order to comply with Ontario law, I needed to re-install marker “signal” lights on the Fiero. A few months back I saw a real Ferrari 360 Modena in Toronto, and the Modena…

Fiero stereo installation is complete
With the mounting plate finished and painted, the stereo system was completely installed. The system sounds great great (4x50w) and the iPod integration works terrific. Surprisingly this was an easy installation, and only took 3-4 hours (total time).

Fiero sub woofers
I finished the installation of the Fiero sub woofers, and powered up the SST radio for a test run. I still have a wiring mess to hide, …but it sounded great!

Prepping the SST radio harness
I finished mating the SST harness to the Fiero radio harness. I bought the Fiero radio harness off eBay for $5. It allows you to adapt any radio harness to the stock harness. It also allows quick disconnect/reconnect for servicing – all without cutting any…

Custom mouting plate for the SST
The new SST radio comes with a flush mounting kit. This allows the controller to be mounted “properly” in the dash – rather than using the standard bracket. In order to mount it in the Fiero, …like everything else, …fabrication needs to be done. I…

New Fiero audio system has arrived
My new audio system arrived in the mail the other day. It is called the Secret Audio SST – “Stealth Sound Technology”. In other words it is a radio system designed for vehicles without a standard radio/deck DIN size.

Fiero interior is pretty much DONE
I need to install the interior door panels, …and finish installing the sound system, …but aside from those two elements, the interior is done.

Fiero test drive video
Been almost 2 years since I drove this car. Since the plate stickers are not valid (April 2006 was the expiry date) I just took it for a spin around the block. I took some HD video as well.

Fiero seats are installed
After 2 years, the seats are back in the Fiero. I can actually sit in the car now. In the pic I have a pair of old seat covers on them. I want to keep them protected for the remaining installations.

Fiero Ferrari euro shifter
I installed the Rodney Dickman Euro “Ferrari” shifter to the 4-speed shifter assembly.

Fiero custom dash is now installed!
Big day. After 7 months of hard work, the dash is finally back in. I still need to add the components – such as the extra gauges and the MP3 player. But it is satisfying to see this interior come together. FINALLY.

Fiero seat brackets
I have re-attached the Fiero seat brackets. They are ready to go back in the car after being out almost 3 years!! I also sandblasted the seat bolts – they were a bit too “rusty” for the new interior.


