Category: Projects

Dash gap fix
I decided to fix the dash gap with fiberglass, rather than rely on upholstery to cover up the misalignment. Duct-tape was used to form the shape, and act as a removable barrier. It turned out quite well.

Interior paint testing
I did a paint test with one of the mock-up pillar pieces I have. So far the best solution for interior paint is: – Wipe down the piece with paint thinner; – Scuff with 3M abrasive pad (lightly); – One thin coat of clear primer…
Fiero custom door panels are complete
The fabrication stage of the door panels is complete. All that is required now is upholstery and sound padding.

Recognizer update
Updated the main legs with a skeletal neon glow effect.

Some updates to the Tron Recognizer
I have created the inner cut-outs on the main leg supports :)

Custom Fiero door panels
Today I installed the driver’s side PISA door panel. It took about 2 hours and was quite easy. The only problem is that the interior armrest covers the HVAC vent on the dash. I will need to make a custom cut to the armrest –…
![A little progress on the Tron Recognizer [3D]](data:image/svg+xml;base64,PHN2ZyB4bWxucz0iaHR0cDovL3d3dy53My5vcmcvMjAwMC9zdmciIHdpZHRoPSI2MDAiIGhlaWdodD0iMzYyIiB2aWV3Qm94PSIwIDAgNjAwIDM2MiI+PHJlY3Qgd2lkdGg9IjEwMCUiIGhlaWdodD0iMTAwJSIgc3R5bGU9ImZpbGw6I2NmZDRkYjtmaWxsLW9wYWNpdHk6IDAuMTsiLz48L3N2Zz4=)
A little progress on the Tron Recognizer [3D]
I’m making it a little different from the 2010 movie.
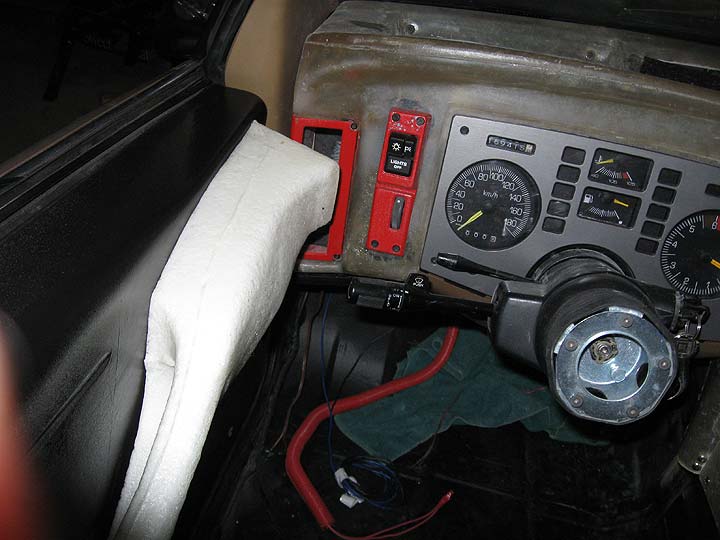
Progress on the Fiero dash – AUX gauges
Today I added the auxiliary (AUX) gauges to the dash – voltmeter and oil pressure gauges. I re-used the old plastic housing piece because it gave a mounting fixture for the gauges. It involved a little cutting because the pig-tail wire that plugs into the…
Fiero middle armrest console
Today I finished installing the middle armrest console – it involved a little bit of trimming. Unfortunately it has a rather large gap on the passenger side – i’ll need to get creative to solve that. I also started mounting the switches. I did not…
Fiero dash mounting brackets are done
Today I finished mounting the dash to the chassis – driver and passenger sides. With the driver’s side, I re-used the old Fiero dash bracket to mount the hood release. On the passenger side I also re-used the old Fiero bracket – I created rubber…
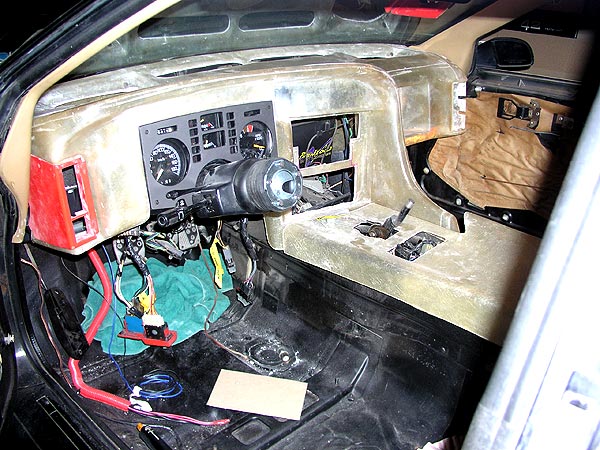
Fiero PISA dash – installation of the instrument cluster
In order to successfully mount the main Fiero instrument cluster, I needed to drop the steering column. Once it was disconnected, I could properly mount the gauges. Note that the original location for the “hidden” cluster mount actually maintains alignment – but it’s “underneath” the…
Fiero dash is partially installed
The PISA dash is partially installed. I have drilled and mounted the upper points – near the speakers. The HVAC ducting is not in place yet. Once I get the dash roughed in, I will pull it out and install the ducts. Sorry for the…
Fiero dash speakers and HVAC vents
I had some time today to cut out the holes for the dash speakers and the HVAC vents. I used a cardboard template to help transfer the hole locations.
A little progress on the Fiero dash
I had some spare time today to cut out the radio console.
Chevrolet Colorado rear drum replacement
The rear drums on my Colorado have been squealing for a few months now, so I decided to replace them. I bought new shoes and drums – although you can have your drums turned down if you wish. The process of changing the drums was…

Building a shed – Part 3 (complete)
Today the shed installation was completed. Installation began about 10 a.m. in the morning, and it was finished about 12:30 p.m. – 2.5 hours total. I’ll let the pictures do the rest of the talking :)
Building a shed base – Part 2
I required almost 2 FULL yards of limestone to make up for the grade of the backyard. In order to completely finish off the support, I used 2x10x10 pressure treated boards with 2′ rebar to support the limestone – this will help it stay in…
Foyer step is stained
Two coats of stain, and three coats of polyurethane has produced a nicely stained oak step. It took about four days to complete the staining process, and most of that time was just waiting for the different coats to dry properly.
Replacing the friction disc on a snowblower
Replacing the friction disc is pretty straight forward. Depending upon your two-stage snowblower model (most of them follow the same basic design) you will need to remove the bottom plate that covers all of the internal drive components. Tilting the snowblower to the front makes…
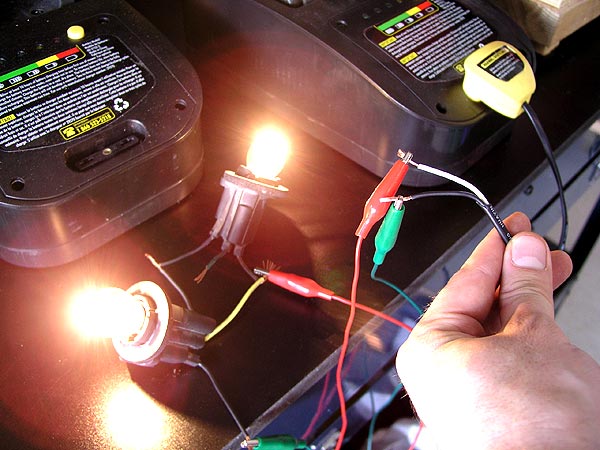
Yardworks 24V lawnmower batteries
I’ve had our Canadian Tire Yardworks lawnmower for over 2 years now, and like everyone else, …I’ve dealt with the crappy 24v batteries. But I’ve developed a system. I currently have 3 batteries that I use to mow the lawn. In most cases I can…
Installing a LCD wall mount
I bought a LCD wall mount bracket off ebay about a month ago (fairly cheap, only $50 shipped) and I finally got around to installing it. The quality was very good – I was surprised because of the price I paid for it. The biggest…
Replacing the Saturn exhaust system
This was a pretty big project. I have worked on exhaust systems before, but I’ve never done a total replacement from the headers back. Total cost on the project was about $400. Not too bad, but I purchased a lot of the exhaust pipes from…


![More Recognizer work [3D]](https://www.justinchristie.ca/wp-content/uploads/2011/02/20110225_tron_recognizer_3D_02.jpg)
![A little progress on the Tron Recognizer [3D]](https://www.justinchristie.ca/wp-content/uploads/2011/02/20110223_tron_recognizer_3d_01.jpg)
![My new project – Tron Recognizer [3D]](https://www.justinchristie.ca/wp-content/uploads/2011/02/20110214_tron_recognizer_2.jpg)