Category: Miscellaneous

Star Destroyer exiting light speed – video
My interpretation of a Star Destroyer exiting light speed. Inspired by the Scarif battle scene in Rogue One. Cinema4D was used to create the animation, and then the output was brought into Adobe Premiere for the addition of sound, and some colour correction.

Upgrading the boat dolly
This an update to the boat mover dolly I created in 2014: http://www.justinchristie.ca/2014/10/01/building-a-boat-dolly/ After some repeated use I discovered that the bicycle tires I free-cycled were not coping well with the combined weight of the dolly and boat. The tires were starting to buckle, and one…

Worm hole in After Effects
Inspired by the worm hole in the film Interstellar, …I decided to make my own version in After Effects CC 2014. It’s surprisingly easy to do – it’s just a multitude of layers using the lens and bulge effects. This is how the gravitational lensing…

Building a boat motor stand
I purchased an older Evinrude 2hp boat motor (model E2RCNE), and I wanted an easy way to store and service it – the obvious solution is to build a motor stand/dolly. I started off with a ‘movers dolly’ from Princess Auto – it was made…

Installing a patio with high performance bedding
I spent a few weeks (back in Spring 2013) going back and forth on a decision to install a deck or a patio in our backyard. I ultimately decided on a patio because it would last longer and have less maintenance – however it would…

Repairing a drywall anchor hole
This is what happens when you use cheap drywall anchors – they will spin in the drywall and create a gaping hole. To solve this, TOGGLER makes an anchor kit specifically for hollow areas – you can purchase this at most hardware stores. In my…

Revitalizing an old fence
If you have an older fence, you can revitalize it for minimal cost with a few pressure treated boards and outdoor stain. At the back of our property we had an older fence – it looked like it was about 10 years old. It was…

RBK X-Pulse goalie blocker
I purchased this blocker a few weeks ago – it was only used for 30mins by it’s previous owner. It’s a very well made blocker – the quality of material is leather with some weave material. The palm seems very “heavy-duty”, yet it’s very comfortable…

Koho 570 goalie glove
I purchased this Koho 570L goalie glove off ebay – as you can see, it was hardly used. If you have big hands, this glove will fit you perfectly – lots of room. Unfortunately you won’t be able to use this catcher if you play…

Installing an electrical panel plywood “backer”
The builder didn’t provide anything to mount accessories around the electrical panel. Most builders (obviously not all) give a plywood surface to mount the phone demarcation point and satellite/cable lines. Since organization makes life easier, …a plywood panel needed to be installed. This was a…

Installing a LCD screen mount with no stud anchors
If you need to install an LCD screen in an area that doesn’t have studs accessible to anchor the mount(s), then this post should help you out. There are two windows (on each side) where the LCD mount needed to be installed. The mount being…

Fiero custom dash is now installed!
Big day. After 7 months of hard work, the dash is finally back in. I still need to add the components – such as the extra gauges and the MP3 player. But it is satisfying to see this interior come together. FINALLY.

Fiero seat brackets
I have re-attached the Fiero seat brackets. They are ready to go back in the car after being out almost 3 years!! I also sandblasted the seat bolts – they were a bit too “rusty” for the new interior.

Installation of the Fiero carpet
Today I began the installation of the Fiero Store carpet I purchased over 4.5 years ago. It’s over-sized, so I need to trim down the edges. Exciting!

Fiero dash vent
I re-used the original grille for the front window vent on the PISA dash. I cut off all the mounting tabs, sandblasted the old paint off, then I put on a fresh coat of black paint to match the rest of the interior. An epoxy…

Fiero floor pan – final coat of paint
The final coat of rubberized paint was applied to the floor pan (driver and passenger) before carpet installation.

Painting the interior pieces
Painting, painting, and more painting. It is really amazing how many pieces you have to paint when you are changing the colour of the interior.

Fiero interior pieces are back from upholstery
The interior pieces came back from upholstery, and all I can say is WOW. I can’t wait to get these installed! The pictures don’t do them justice.

Painting begins – Fiero interior pieces
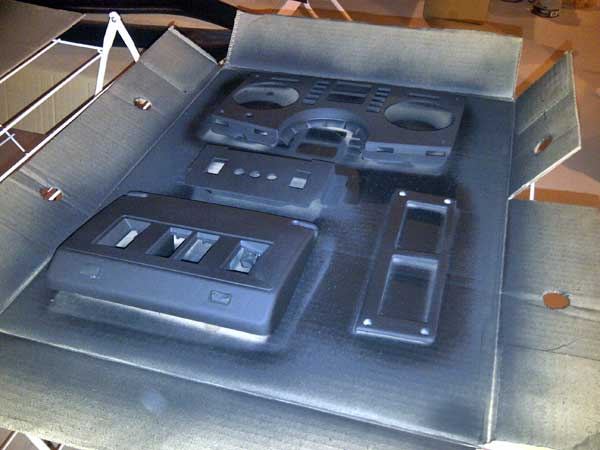
I began painting the interior pieces for the Fiero. I used the Dupli-color plastic adhesive first, then a coat of matte-black Tremclad. I’m using the same recipe that I tested here.

3D Tron Recognizer – update
I have commenced modelling on the upper cock-pit area. I’ve also added a few neon-glow features on the chassis.

Tron Recognizer 3D – more progress
I created exhaust guards at the bottom of the legs, and I’ve started shaping the main personnel carrier section.


