Category: Cars

Fiero HVAC ducts
Not the prettiest application of fiberglass, but it works! A fresh coat of paint always makes it look better.

Fiberglass gap fix for the Fiero PISA dash
After the fiberglass cured, I pulled off the duct-tape and trimmed the edges. It will require a little more sanding and body-filler to finish, …but I’m quite pleased with how it turned out.

Dash gap fix
I decided to fix the dash gap with fiberglass, rather than rely on upholstery to cover up the misalignment. Duct-tape was used to form the shape, and act as a removable barrier. It turned out quite well.

Interior paint testing
I did a paint test with one of the mock-up pillar pieces I have. So far the best solution for interior paint is: – Wipe down the piece with paint thinner; – Scuff with 3M abrasive pad (lightly); – One thin coat of clear primer…

Fiero custom door panels are complete
The fabrication stage of the door panels is complete. All that is required now is upholstery and sound padding.

Custom Fiero door panels
Today I installed the driver’s side PISA door panel. It took about 2 hours and was quite easy. The only problem is that the interior armrest covers the HVAC vent on the dash. I will need to make a custom cut to the armrest –…

Progress on the Fiero dash – AUX gauges
Today I added the auxiliary (AUX) gauges to the dash – voltmeter and oil pressure gauges. I re-used the old plastic housing piece because it gave a mounting fixture for the gauges. It involved a little cutting because the pig-tail wire that plugs into the…

Fiero middle armrest console
Today I finished installing the middle armrest console – it involved a little bit of trimming. Unfortunately it has a rather large gap on the passenger side – i’ll need to get creative to solve that. I also started mounting the switches. I did not…

Fiero PISA dash – installation of the instrument cluster
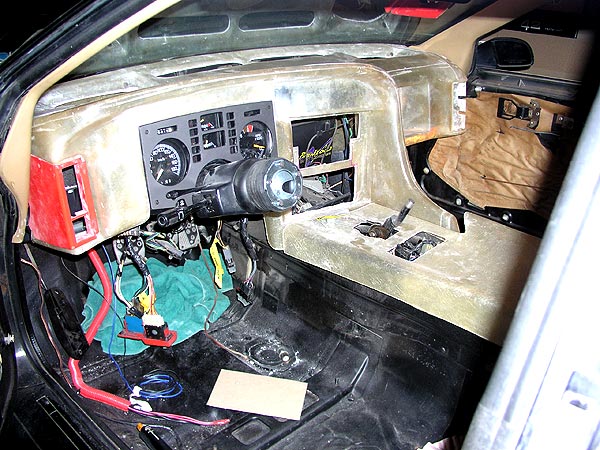
In order to successfully mount the main Fiero instrument cluster, I needed to drop the steering column. Once it was disconnected, I could properly mount the gauges. Note that the original location for the “hidden” cluster mount actually maintains alignment – but it’s “underneath” the…

Fiero dash is partially installed
The PISA dash is partially installed. I have drilled and mounted the upper points – near the speakers. The HVAC ducting is not in place yet. Once I get the dash roughed in, I will pull it out and install the ducts. Sorry for the…

Fiero dash speakers and HVAC vents
I had some time today to cut out the holes for the dash speakers and the HVAC vents. I used a cardboard template to help transfer the hole locations.

A little progress on the Fiero dash
I had some spare time today to cut out the radio console.

Chevrolet Colorado rear drum replacement
The rear drums on my Colorado have been squealing for a few months now, so I decided to replace them. I bought new shoes and drums – although you can have your drums turned down if you wish. The process of changing the drums was…
Saturn bolt pattern reference
Since I’m searching for a set of winter tires, I came across this little guide for Saturns. The S-series Saturns use a 4×100 bolt pattern. Thought I would post it here incase other people need it. MODEL YEAR SIZE P.C.D. LUG SIZE MM OS L…

Replacing the Saturn exhaust system
This was a pretty big project. I have worked on exhaust systems before, but I’ve never done a total replacement from the headers back. Total cost on the project was about $400. Not too bad, but I purchased a lot of the exhaust pipes from…

Fiero GT bumper
Sorry for the lack of updates. I have been really busy with freelance work at the moment. That’s bad for getting work done, …but good for extra money to buy fiero goodies :D I did, however, buy a GT bumper for the GT conversion I…
New Fiero GT LED tail lights
These should be arriving within the next week or so. They have four 4″ LED (10 LEDs in each lens) lights with a fiberglass shell that replaces the entire GT tail light section. These will fit in nicely with the fastback conversion I am doing…

Saturn transmission input shaft nut
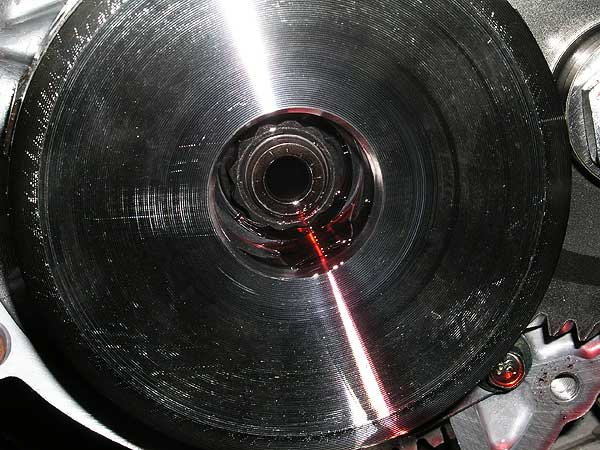
In my last post, I went through the process of changing the valve body of the automatic transmission in the Saturn SL1. In this post, I’m going to cover how you replace the input shaft nut in the automatic transmission. The input shaft nut becomes…

Replacing the Saturn Valve Body in the transmission
In order to solve the dreaded Saturn “reverse-slam” that automatic transmissions develop over time, you have to replace the valve body inside the transmission. The valve body can be rebuilt, but it must be done with “Sonnax” internal parts – using those quality parts will ensure that…

Taking off some Fiero parts
I took some Fiero parts off today to sell on eBay. The Holley scoop and the sail panels are going up for sale. This is all part of the fastback conversion that I am doing in the next few months. In one of the picture…

Saturn serpentine belt + idler pulley replacement
Since the SW1 was squeaking during idle, I needed to replace the idler pulley. I figured that while I was replacing the idler pulley, I might as well replace the serpentine belt – just practicing PREVENTATIVE maintenance :) I thought it would be a 30…

Looking for a Fiero fastback part
I’m looking for the side pieces that turn the standard Fiero trunk into the fastback square trunk. I’ve got both sides, but they aren’t in the best of shape. Plus I’m missing one of the plastic clamps.

GT quarter window scoops
I went and picked up a set of fiberglass scoops – they will replace the cracked GT glass windows. These provide better air-flow to the rear engine. Plus they look cool :)

Chevrolet Volt
I’ve been watching the whole Chevy Volt project that GM is coming out with in the near future, and I’ve got to say that I’m impressed with it. I’d like to get one when they come out, but I think I’ll wait and see what…


